The first step to keeping your cool air flowing and your electric bill from screaming is simple: clean your fan. It doesn’t have to be a big production—just a few smart hacks that actually work. FYI, your fan will thank you with quieter spinning and a healthier breeze.
1) Quick dust-off before you dive in
Dust loves to set up shop on blades like it’s a tiny spa retreat. Skip the drama and give it a fast once-over first.
- Unplug the unit. Safety first, friend.
- Remove the grid or blades if needed, following the manual so you don’t end up with a mystery screw orbiting your living room.
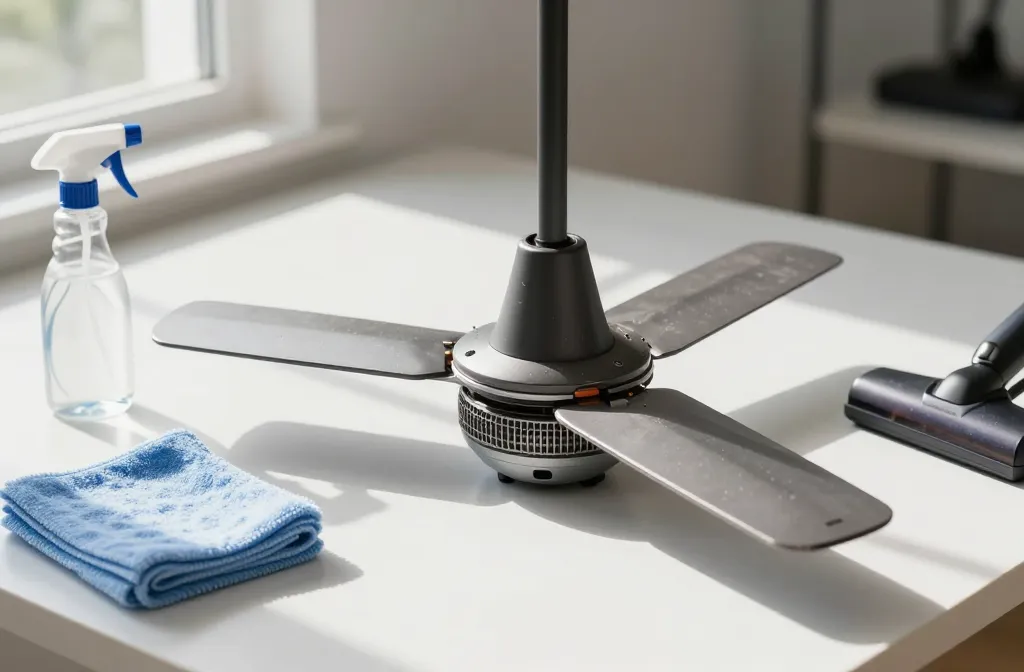
- Wipe blades with a microfiber cloth dampened with water or a gentle cleaner. Dry them thoroughly.
Doing a quick pass first prevents a snowy dust storm when you go deeper. Also: don’t use harsh chemicals on plastic blades—they can fog or weaken the plastic over time.
2) The great disassembly: what to take off and what to leave on
Sometimes the easiest clean is the one you do in stages. Decide what you can safely remove and what stays put.
- Headache-free option A: remove just the grill and blades to clean separately.
- Option B: if you’re handy, remove the blade guard and wash the blades in warm, soapy water. Rinse and dry completely before reassembling.
- Option C: if you’re unsure, stick with the basic wipe-down and a quick vacuum around the base.
Bottom line: more parts off means a deeper clean, but more parts also means more chances to drop something. Do what feels reasonable for you, and leave the rest to your future, more ambitious self.
3) Clean with care: the right tools for the job
The right tools turn a chore into a breeze. Here’s what to reach for.
- Microfiber cloths for dusting without scratching.
- A small brush or old toothbrush to reach tight grooves.
- A vacuum with a brush attachment to suck up stubborn dust from the base and motor housing.
- Gentle dish soap mixed with warm water for blades and grills. No bleach or strong solvents on plastics.
Pro tip: avoid spraying cleaners directly onto the motor. A damp cloth is your friend here. No one wants a fried fan and a shocked power supply combo.
4) Deep clean hacks that actually work

If you’re ready to go all-in, these hacks hit the sweet spot between effective and simple.
4.1 Soak-and-scrub for detachable blades
Fill a basin with warm water and a squirt of dish soap. Soak the blades and grill for a few minutes, then scrub with a soft brush. Rinse well and dry completely before reassembling. FYI, this is where you can reclaim shiny blades that look almost new.
4.2 Steam-clean for stubborn grime
If you’ve got a handheld steamer, a quick pass over the grill and motor housing loosens built-up gunk without harsh chemicals. Don’t overdo it—stay away from the motor area and let everything dry fully before powering back up.
4.3 Vacuum-assisted corners
Use the vacuum’s crevice tool to suck out dust from tight seams and around the motor housing. It’s amazing how much dust hides in plain sight. The fewer particles near the bearings, the happier your fan runs.
5) Reassembly and first-time test: the moment of truth
Reassembly is where you either feel like a DIY hero or a cartoon with a squeaky wheel.
- Double-check that every part is dry before you put it back together. Water + electricity = not ideal.
- When you power it on, listen for odd noises. Any rattling means you might have a loose blade—power off and stop to recheck.
- Run it on low for a few minutes, then medium, to ensure smooth rotation and even air.
If it sounds normal and cool air starts pouring, you just earned a small victory. Celebrate with a brief cool-down dance, then get back to enjoying a quieter room.
6) Maintenance habits that keep dust at bay
Cleaning isn’t a one-and-done hustle; it’s a rhythm.
- Schedule a mini clean every 1–2 months, depending on how dusty your space is. Yes, even in winter you’ll have dust.
- Place fans away from open windows when you can, to minimize pollen and outdoor grime riding in.
- Use a washable filter or simple cover if your fan sits unused for long stretches.
IMO, a little regular attention beats a full-on scrub-down every few months. Consistency wins when it comes to airflow and energy efficiency.
FAQ
Is it safe to clean a ceiling fan while it’s running?
Nope. Always unplug or switch off the breaker first. If you can, use the reverse switch to move blades slowly and hold a cloth nearby to catch dust as it falls.
What cleaners should I avoid on plastic blades?
Avoid ammonia, bleach, and solvent-heavy cleaners. They can haze or degrade plastic over time. Stick to mild dish soap and water, or a dedicated plastic-safe cleaner.
How do I know if a fan needs more than a wipe-down?
If you notice persistent wobbling, unusual noises, or reduced airflow after a wipe-down, you’re in “deep clean” territory. It might be time to disassemble more or check for bent blades or misaligned screws.
Can I clean a fan with the blades still attached?
Yes, for a quick refresh. Use a microfiber cloth and a duster to capture surface dust. If you want a deeper clean, remove the blades according to the manual and do a proper wash.
What if the motor housing gets damp?
Let it dry completely before powering back on. If you’re unsure, give it extra drying time and, when in doubt, consult the manual or a pro. Moisture near electrical components is a recipe for trouble.
Conclusion
Keeping your fan clean doesn’t have to be dramatic. A few smart steps, the right tools, and a bit of routine care will keep air moving nicely and quietly. Best of all, you don’t need a spa day for your appliances—just a few focused minutes here and there. So grab your cloth, your tiny brush, and your sense of humor. FYI, you’ll appreciate the fresher air more than you expect. Stay cool, my friend.
Leave a Reply